wordpress搭建笔记
之前使用hexo搭建了静态博客,使用markdown写博客感觉挺舒服的。哦,还有点不完善的地方,但是总体也算不错了。
准备给宝宝搭建一个网络空间,考虑到尽量让操作简便,可以通过手机,pad直接在线发布日志。所以选择了wordpress。
准备使用CentOs7.2+nginx1.12.2+ php 7.2 + php-fpm +MySQL5.6.39+wordpress4.9.4来搭建。
apache2.4 暂时没有使用,直接用nginx+php-fpm了。
安装php
准备环境和版本,经过调研WordPress 4已经支持php7了,并且优化的很好。所以这里下载php-7.2.3.tar.xz版本。
具体方法参见”centos7.2 环境搭建”
安装apache
下载wordpress
web路径所属用户和组都改为apache:apache
必装插件
Akismet 垃圾评论过滤
TinyMCE Advanced 编辑器插件
增加备案号
- 首先使用FTP工具在网站安装目录的/wp-content/languages 目录下找到 zh_CN.php 文件
- 用记事本或者php编辑器打开,找到如下图代码块:
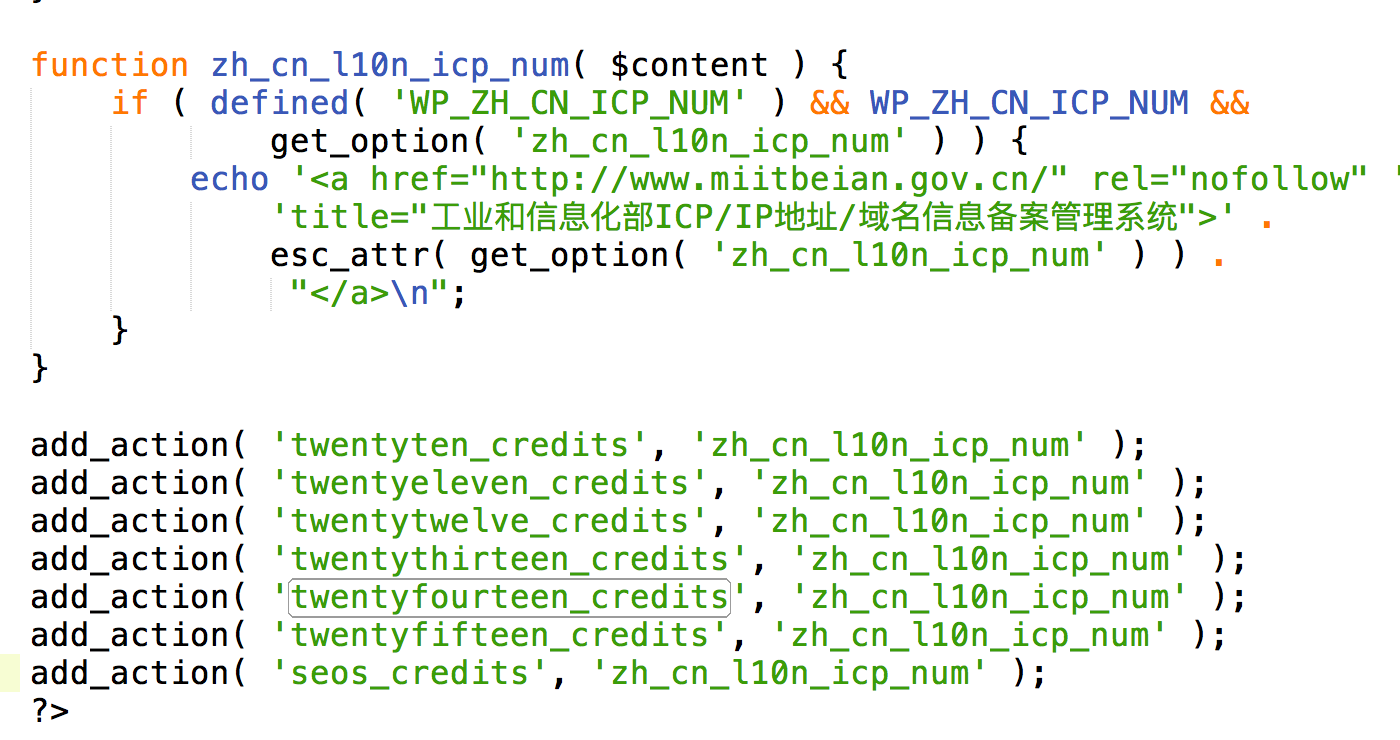
add_action(‘xxxx’, ‘zh_cn_l10n_icp_num’);
语句就是给主题添加备案号功能,在最后一个add_action下面再添加一句
add_action(‘themsicp’, ‘zh_cn_l10n_icp_num’);
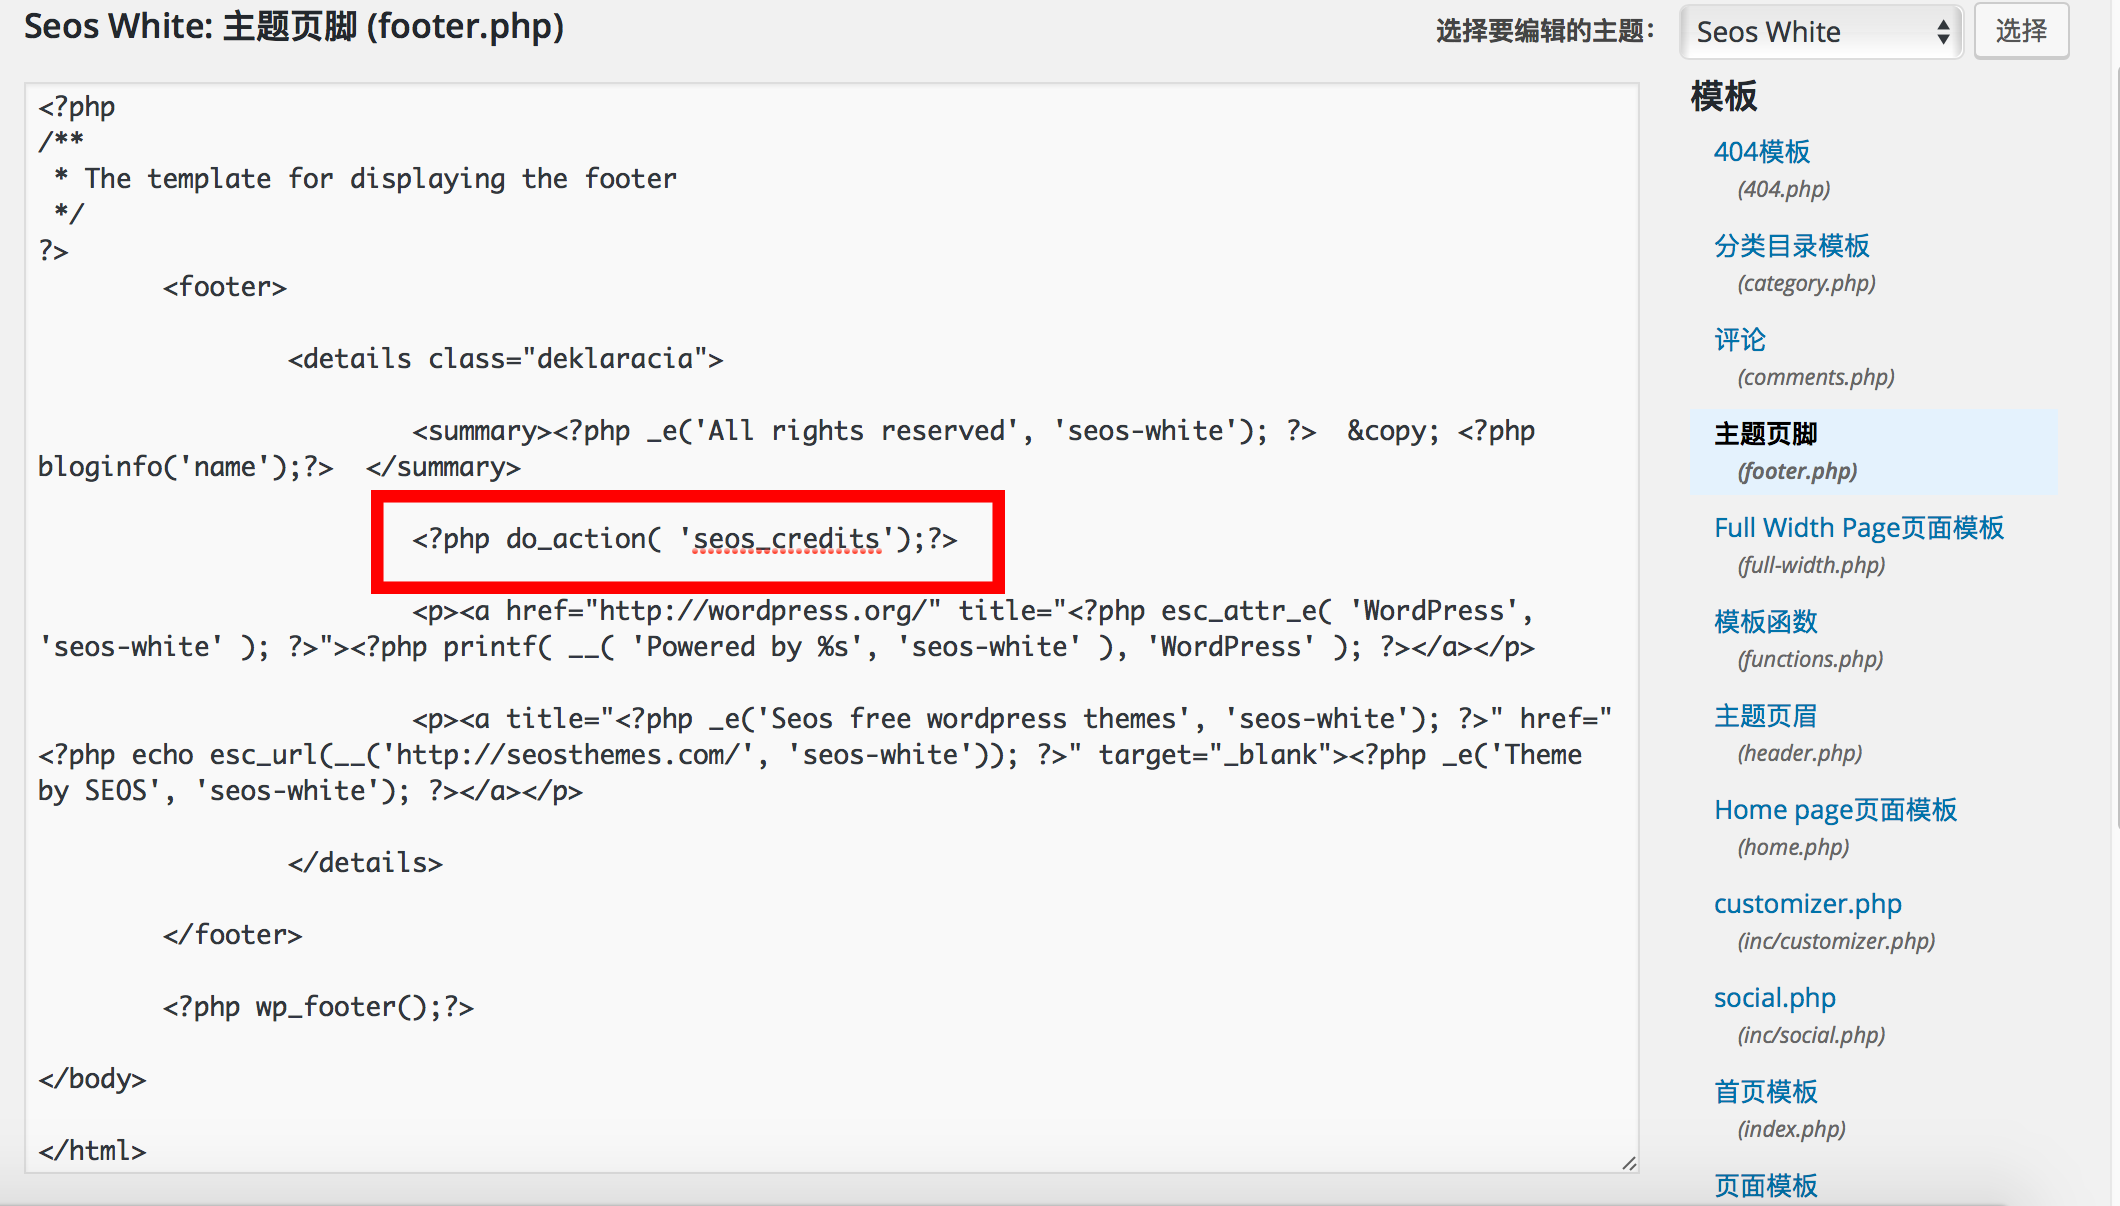
- 接下来打开WordPress的后台,点击 外观–>编辑 进入主题编辑页面:
在右侧找到你主题的footer.php页面并点击,就可以在左侧的编辑区进行编辑了,然后点击更新文件。...
<?php do_action('themsicp');?>
</div><!-- .wrap -->
...
创建数据库wordpress
mysql -u root -p
create database wordpress;
GRANT ALL PRIVILEGES ON wordpress.* TO “wpuser”@”localhost” IDENTIFIED BY “xxx”;
FLUSH PRIVILEGES;
GRANT ALL PRIVILEGES ON xxDb.* TO “wpuser”@”localhost” IDENTIFIED BY “xxx”;
在你的网页服务器上为WordPress创建一个数据库, 并且也创建一个MySQL 拥有所有权限可以进入和修改的用户.
将WordPress文件放在根目录下的用户请访问:http://example.com/wp-admin/install.php
创建用户:
CREATE USER 'wpuser'@'localhost' IDENTIFIED BY 'xxx'
说明:username - 你将创建的用户名, host - 指定该用户在哪个主机上可以登陆,如果是本地用户可用localhost, 如果想让该用户可以从任意远程主机登陆,可以使用通配符%. password - 该用户的登陆密码,密码可以为空,如果为空则该用户可以不需要密码登陆服务器.
支持https
配置wordpress
打开wp-config.php文件,添加下面语句define('FORCE_SSL_ADMIN', true);
申请https证书
Let’s encrypt
免费提供https证书
官方推荐certbot自动化工具。
选择软件和系统
sudo yum -y install yum-utils
sudo yum-config-manager –enable rhui-REGION-rhel-server-extras rhui-REGION-rhel-server-optional
sudo certbot –nginx
IMPORTANT NOTES:
- Congratulations! Your certificate and chain have been saved at:
/etc/letsencrypt/live/shgis.top/fullchain.pem
Your key file has been saved at:
/etc/letsencrypt/live/shgis.top/privkey.pem
Your cert will expire on 2018-06-26. To obtain a new or tweaked
version of this certificate in the future, simply run certbot again
with the “certonly” option. To non-interactively renew all of
your certificates, run “certbot renew”
自动更新:
测试一下sudo certbot renew --dry-run
新建一个crontab0 0,12 * * * python -c 'import random; import time; time.sleep(random.random() * 3600)' && certbot renew
全部操作完成后,重启 nginx 即可。